> ## Documentation Index
> Fetch the complete documentation index at: https://developer.uphold.com/llms.txt
> Use this file to discover all available pages before exploring further.
# Google Pay deposit via the Payment Widget
> Fund a user's account with Google Pay using the Uphold Payment Widget.
export const apmLabel_3 = "Google Pay"
export const apmLabel_2 = "Google Pay"
export const direction_0 = "deposit"
export const apmLabel_1 = "Google Pay"
export const apmLabel_0 = "Google Pay"
The Payment Widget handles Google Pay selection for deposits via the **Select for Deposit flow**, where users can select Google Pay as the payment method. After the user confirms a Google Pay deposit quote, the Payment Widget completes the Google Pay authorization and creates the transaction via the **Authorize flow**.
## Prerequisites
* The user has [completed onboarding](/developer-guides/user-onboarding/overview).
* The `google-pay` capability is enabled.
* The Payment Widget is [set up in your frontend](/widgets/payment/installation-and-setup).
* [Google Pay's additional setup requirements](/developer-guides/apm-transfers/overview#browser-and-platform-compatibility-payment-widget) are met.
## Walkthrough
```mermaid theme={null}
sequenceDiagram
autonumber
participant Usr as User
participant U as Your App
participant B as Your Backend
participant P as Payment Widget
participant A as Uphold
Usr->>U: Start deposit
U->>B: Create widget session
B->>A: Create widget session (select-for-deposit)
A-->>B: { session }
B-->>U: { session }
U->>P: Initialize widget
Usr->>P: Select Google Pay
P-->>U: complete { via, selection }
U->>B: List accounts
B->>A: GET /core/accounts
A-->>B: { accounts }
B-->>U: { accounts }
Usr->>U: Choose destination account and amount
U->>B: Create quote
B->>A: Create quote (APM → account)
A-->>B: { quote }
B-->>U: { quote }
U->>B: Create authorize session
B->>A: Create widget session (authorize)
A-->>B: { session }
B-->>U: { session }
U->>P: Initialize widget
Usr->>P: Authorize with Google Pay sheet
P->>A: Create transaction
A-->>P: { transaction (with confirmationUrl if authorization required) }
opt confirmationUrl present
Usr->>P: Complete authorization challenge
end
P-->>U: complete { transaction, trigger }
B-->>Usr: Notify the user
```
***
## Select deposit method
The Payment Widget's **Select for Deposit flow** presents the available payment methods, letting the user select Google Pay when it's available. It performs **selection only**: it does not create the quote or the transaction.
### Create a widget session
Call [Create widget session](/rest-apis/widgets-api/payment/create-session) to start the `select-for-deposit` flow.
```http theme={null}
POST /widgets/payment/sessions
{
"flow": "select-for-deposit"
}
```
```json theme={null}
{
"session": {
"flow": "select-for-deposit",
"url": "https://payment.enterprise.uphold.com/",
"token": "GEbRxBN...edjnXbL"
}
}
```
Pass `response.session` to your frontend to initialize the widget.
### Set up the widget
```javascript Web SDK [expandable] theme={null}
import { PaymentWidget } from '@uphold/enterprise-payment-widget-web-sdk';
const initializeDepositWidget = async (session) => {
const widget = new PaymentWidget<'select-for-deposit'>(session, { debug: true });
widget.on('complete', (event) => {
console.log('Complete', JSON.stringify(event.detail.value));
});
widget.on('cancel', () => {
console.log('Cancelled');
widget.unmount();
});
widget.on('error', (event) => {
console.error('Error', event.detail.error);
widget.unmount();
});
widget.mountIframe(document.getElementById('payment-container'));
};
```
```html JavaScript [expandable] theme={null}
```
Both examples above are for web applications — either creating the iframe yourself or letting the SDK do it. For native apps using a WebView, see [Native apps with the SDK](/widgets/payment/installation-and-setup#native-apps-with-the-sdk) for the SDK's native-bundling pattern, or [Setup with JavaScript](/widgets/payment/installation-and-setup#setup-with-javascript) for the no-SDK approach that loads the session `url` directly as the WebView's top-level page.
### Handle the complete event
The `complete` event fires after the user selects Google Pay.
```javascript Web SDK theme={null}
widget.on('complete', (event) => {
const { via, selection } = event.detail.value;
// If via is 'apm', you can check the selected method through the property `selection.method`, which will be 'google-pay' in this case.
if (via === 'apm' && selection.method === 'google-pay') {
handleGooglePaySelected();
}
widget.unmount();
});
```
```javascript JavaScript theme={null}
// Inside the onMessage switch from Set up the widget
case 'complete': {
const { via, selection } = event.data.value;
// If via is 'apm', you can check the selected method through the property `selection.method`, which will be 'google-pay' in this case.
if (via === 'apm' && selection.method === 'google-pay') {
handleGooglePaySelected();
}
teardown();
break;
}
```
Once you have the selection, prompt the user to choose a destination account, then create a quote.
### Handle cancellations
```javascript Web SDK theme={null}
widget.on('cancel', () => {
widget.unmount();
// Return the user to the previous screen
});
```
```javascript JavaScript theme={null}
// Inside the onMessage switch from Set up the widget
case 'cancel':
teardown();
// Return the user to the previous screen
break;
```
### Handle errors
The `error` event fires for critical unrecoverable errors.
```javascript Web SDK theme={null}
widget.on('error', (event) => {
console.error('Widget error:', event.detail.error);
widget.unmount();
// Show a user-friendly error message
});
```
```javascript JavaScript theme={null}
// Inside the onMessage switch from Set up the widget
case 'error':
console.error('Widget error:', event.data.error);
teardown();
// Show a user-friendly error message
break;
```
The Payment Widget handles most errors internally. For unrecoverable errors, the widget fires an `error` event. It is the host application's responsibility to handle these events, present an error message to the user, and unmount the widget.
***
## Select destination account
{apmLabel_3} deposits can target any account. If the selected account is not in the {apmLabel_3} account's currency, the amount will be converted at settlement using Uphold's prevailing rate. Make sure the destination asset has the necessary [features enabled](/rest-apis/core-api/assets/introduction#features-and-deposits-/-withdrawals).
### Find an existing account
Call [List accounts](/rest-apis/core-api/accounts/list-accounts) to retrieve the user's accounts and let them pick the one they want to fund.
```http theme={null}
GET /core/accounts
```
```json theme={null}
{
"accounts": [
{
"id": "a00507fe-628c-4f27-ae81-e1c40b2a8fb8",
"ownerId": "e4ce04dc-67b7-4e9f-af91-482cb6f9fc4a",
"label": "My USD account",
"asset": "USD",
"balance": {
"total": "500.00",
"available": "500.00"
}
}
]
}
```
### Create a new account
If the user has no accounts, create one with [Create account](/rest-apis/core-api/accounts/create-account) before proceeding.
```http theme={null}
POST /core/accounts
{
"label": "My USD account",
"asset": "USD"
}
```
```json theme={null}
{
"account": {
"id": "a00507fe-628c-4f27-ae81-e1c40b2a8fb8",
"ownerId": "e4ce04dc-67b7-4e9f-af91-482cb6f9fc4a",
"label": "My USD account",
"asset": "USD",
"balance": {
"total": "0",
"available": "0"
}
}
}
```
Once the user selects Google Pay and their account, proceed to [Create a quote](#create-a-quote).
***
## Create a quote
Call [Create quote](/rest-apis/core-api/transactions/create-quote) with Google Pay as the origin and the user's account as the destination.
Specify Google Pay as the origin with `type: "apm"` with `method: "google-pay"`.
```http theme={null}
POST /core/transactions/quote
{
"origin": {
"type": "apm",
"method": "google-pay"
},
"destination": {
"type": "account",
"id": "71e9fd4b-dfcd-4643-a5b0-51fd33e50a8d"
},
"denomination": {
"asset": "USD",
"amount": "50",
"target": "origin"
}
}
```
A successful response includes the quote details and a `requirements` array. For Google Pay, it contains `authorize:google-pay`, which indicates that the user must authorize Google Pay before the transaction can be created.
```json [expandable] theme={null}
{
"quote": {
"id": "c3e8d2f7-9a41-4b75-b8e3-1d6f4a9c2e57",
"origin": {
"amount": "50.00",
"asset": "USD",
"node": {
"type": "apm",
"method": "google-pay"
},
"rate": "1"
},
"destination": {
"amount": "50.00",
"asset": "USD",
"node": {
"type": "account",
"id": "71e9fd4b-dfcd-4643-a5b0-51fd33e50a8d",
"ownerId": "48e40cb2-6c34-44ce-b2f1-6adac459bb37"
},
"rate": "1"
},
"denomination": {
"asset": "USD",
"amount": "50.00",
"target": "origin",
"rate": "1"
},
"fees": [],
"expiresAt": "2025-06-18T01:55:39Z",
"requirements": [
"authorize:google-pay"
]
}
}
```
***
## Authorize and create the transaction
After the user confirms the Google Pay quote, hand off to the Payment Widget **Authorize flow**. It presents the Google Pay sheet, creates the transaction, and polls until a terminal status is reached. Google Pay authorizes **per transaction** — there is no stored authorization to reuse, so the user confirms via the Google Pay sheet every time. By default, the widget renders a full walkthrough around the authorization; in **headless mode**, it renders only the Google Pay button so you can embed it directly into your own UI — see [Headless mode](#headless-mode) below.
### Authorization challenges
Some deposits take one more step after the user confirms the Google Pay sheet: the card backing the wallet may also need to be authorized, through a challenge such as 3DS. The card's issuer decides this per transaction, so it isn't known until the transaction is created.
The Authorize flow covers this: when a challenge is required, the widget presents it to the user, and only polls for a terminal status once it's resolved. The same integration works whether or not a challenge comes up — there is nothing extra to handle on your side, beyond expecting those deposits to take longer to complete.
**Headless mode** is only supported on **Android** devices and cards that support `CRYPTOGRAM_3DS`. Cards requiring 3D Secure (3DS) authentication are not supported in headless mode — see [Headless mode](#headless-mode) below.
### Create an authorize session
Call [Create widget session](/rest-apis/widgets-api/payment/create-session) with `flow: "authorize"`, the `quoteId` and with the `requirements` array containing `authorize:google-pay`.
```http theme={null}
POST /widgets/payment/sessions
{
"flow": "authorize",
"data": {
"quoteId": "",
"requirements": [
"authorize:google-pay"
]
}
}
```
```json theme={null}
{
"session": {
"flow": "authorize",
"url": "https://payment.enterprise.uphold.com/",
"token": "GEbRxBN...edjnXbL",
"data": {
"quoteId": "",
"requirements": [
"authorize:google-pay"
]
}
}
}
```
### Set up the widget
Initialize the widget with the session. The widget presents the {apmLabel_0} sheet, collects device data, creates the transaction, and polls until a terminal status is reached.
```javascript Web SDK [expandable] theme={null}
import { PaymentWidget } from '@uphold/enterprise-payment-widget-web-sdk';
const initializeAuthorizeWidget = async (session) => {
const widget = new PaymentWidget<'authorize'>(session, { debug: true });
widget.on('complete', (event) => {
const { transaction, trigger } = event.detail.value;
console.log('Complete', transaction.status, trigger.reason);
widget.unmount();
});
widget.on('cancel', () => {
console.log('Cancelled');
widget.unmount();
});
widget.on('error', (event) => {
console.error('Error', event.detail.error);
widget.unmount();
});
widget.mountIframe(document.getElementById('payment-container'));
};
```
```javascript JavaScript [expandable] theme={null}
// session is `response.session` from your backend
async function initializeAuthorizeWidget(session) {
const container = document.getElementById('payment-container');
const sessionOrigin = new URL(session.url).origin;
const iframe = document.createElement('iframe');
iframe.src = session.url;
iframe.setAttribute('allow', "clipboard-write 'src'; clipboard-read 'src'; payment 'src';");
iframe.style.width = '100%';
iframe.style.height = '100%';
iframe.style.border = 'none';
function teardown() {
window.removeEventListener('message', onMessage);
iframe.remove();
}
function onMessage(event) {
if (event.origin !== sessionOrigin) return;
switch (event.data?.type) {
case 'load':
iframe.contentWindow.postMessage({ ...session, options: {}, type: 'init' }, sessionOrigin);
break;
case 'complete': {
const { transaction, trigger } = event.data.value;
console.log('Complete', transaction.status, trigger.reason);
teardown();
break;
}
case 'cancel':
console.log('Cancelled');
teardown();
break;
case 'error':
console.error('Error', event.data.error);
teardown();
break;
}
}
window.addEventListener('message', onMessage);
container.appendChild(iframe);
}
```
Both examples above are for web applications — either creating the iframe yourself or letting the SDK do it. For native apps using a WebView, see [Native apps with the SDK](/widgets/payment/installation-and-setup#native-apps-with-the-sdk) for the SDK's native-bundling pattern, or [Setup with JavaScript](/widgets/payment/installation-and-setup#setup-with-javascript) for the no-SDK approach that loads the session `url` directly as the WebView's top-level page.
### Headless mode
By default, the widget renders a full authorization experience — a short walkthrough, the {apmLabel_0} button, and a processing screen while the transaction is confirmed. In **headless mode**, it renders only the {apmLabel_0} button, with no surrounding UI, so you can embed it directly into your own layout. Your app then owns the surrounding context and the post-authorization experience — progress and success feedback, and a way to cancel. {apmLabel_0 === 'Google Pay' && `Because there's no surrounding UI to present a 3DS challenge, headless mode is limited to Android devices with cards that support CRYPTOGRAM_3DS authentication.`}
```javascript Web SDK theme={null}
const widget = new PaymentWidget<'authorize'>(session, {
debug: true,
authorize: {
mode: 'headless'
}
});
```
```javascript JavaScript theme={null}
iframe.contentWindow.postMessage({ ...session, options: { authorize: { mode: 'headless' } }, type: 'init' }, sessionOrigin);
```
See [`AuthorizeFlowOptions`](/widgets/payment/sdk-reference#authorizeflowoptions) in the SDK reference for the full type definition.
### Handle the complete event
The `complete` event does not guarantee success. Always check `transaction.status` and `trigger.reason`.
```javascript Web SDK theme={null}
widget.on('complete', (event) => {
const { transaction, trigger } = event.detail.value;
if (trigger.reason === 'transaction-status-changed') {
if (transaction.status === 'completed') {
// Show success — the transfer settled
} else if (transaction.status === 'failed') {
// Map transaction.statusDetails.reason to a user-facing message
}
} else if (trigger.reason === 'max-retries-reached') {
// Widget stopped polling — continue monitoring via webhooks or polling
}
widget.unmount();
});
```
```javascript JavaScript theme={null}
// Inside the onMessage switch from Set up the widget
case 'complete': {
const { transaction, trigger } = event.data.value;
if (trigger.reason === 'transaction-status-changed') {
if (transaction.status === 'completed') {
// Show success — the transfer settled
} else if (transaction.status === 'failed') {
// Map transaction.statusDetails.reason to a user-facing message
}
} else if (trigger.reason === 'max-retries-reached') {
// Widget stopped polling — continue monitoring via webhooks or polling
}
teardown();
break;
}
```
Failure reasons in `transaction.statusDetails.reason`:
| Reason | Description |
| ----------------------------------- | ----------------------------------------------------- |
| `apm-authorization-failed` | The {apmLabel_0} authorization could not be completed |
| `card-declined-by-bank` | The card was declined by the issuing bank |
| `card-expired` | The card has expired |
| `card-permanently-declined-by-bank` | The card was permanently declined |
| `card-unauthorized` | The card authorization was not completed |
| `card-unsupported` | The card is not supported for this operation |
| `insufficient-funds` | The origin account has insufficient funds |
| `provider-maximum-limit-exceeded` | The transaction exceeds provider limits |
| `velocity` | The transaction was blocked by velocity rules |
| `unspecified-error` | The transaction failed for an unspecified reason |
### Handle cancellations
The `cancel` event fires when the user dismisses the {apmLabel_0} sheet or navigates back without completing authorization.
```javascript Web SDK theme={null}
widget.on('cancel', () => {
widget.unmount();
// Return the user to the previous screen
});
```
```javascript JavaScript theme={null}
// Inside the onMessage switch from Set up the widget
case 'cancel':
teardown();
// Return the user to the previous screen
break;
```
### Handle errors
The `error` event fires for critical unrecoverable errors — except `authorize_transaction_failed`, which is retryable. It is your decision whether to unmount the widget and show a user-facing error message, or leave it mounted so the user can try again.
```javascript Web SDK theme={null}
widget.on('error', (event) => {
const { code, details } = event.detail.error;
console.error('Widget error:', code, details);
if (code === 'authorize_transaction_failed') {
// Retryable — keep the widget mounted so the user can try again
return;
}
widget.unmount();
// Show a user-friendly error message
});
```
```javascript JavaScript theme={null}
// Inside the onMessage switch from Set up the widget
case 'error': {
const { code, details } = event.data.error;
console.error('Widget error:', code, details);
if (code !== 'authorize_transaction_failed') {
teardown();
// Show a user-friendly error message
}
// authorize_transaction_failed is retryable — keep the iframe/WebView mounted so the user can try again
break;
}
```
Error codes in `event.detail.error.code`:
| Code | Description |
| ------------------------------ | ------------------------------------------------------------------------------- |
| `authorize_transaction_failed` | The {apmLabel_0} authorization failed — retryable, unlike the other codes below |
| `entity_not_found` | The quote was not found or has expired |
| `insufficient_balance` | The origin has insufficient balance |
| `operation_not_allowed` | The operation is not permitted |
| `user_capability_failure` | The user lacks the required capability for this operation |
The Payment Widget handles most errors internally. For unrecoverable errors, the widget fires an `error` event. It is the host application's responsibility to handle these events, present an error message to the user, and unmount the widget.
***
## Monitor for settlement
{apmLabel_2} {direction_0} transactions remain in `processing` while the payment settles. Monitor until the transaction reaches a terminal state.
* **Webhook events** (recommended):
* [core.transaction.created](/rest-apis/core-api/transactions/webhooks/transaction-created) — `status: processing` → transaction created, pending settlement
* [core.transaction.status-changed](/rest-apis/core-api/transactions/webhooks/transaction-status-changed) — `status: completed` → funds settled; `status: failed` → irrecoverable error
* **Polling** (fallback): [Get transaction](/rest-apis/core-api/transactions/get-transaction)
***
## Sample transaction
In a successful {apmLabel_1} deposit, the origin is represented as an `apm` node with the method as `{apmMethod}`. The destination is the user's `account`.
```json [expandable] theme={null}
{
"transaction": {
"id": "9b2f4a17-5e3c-4d77-a8e1-9bcdef2c0a42",
"origin": {
"asset": "USD",
"amount": "50.00",
"node": {
"type": "apm",
"method": "google-pay"
}
},
"destination": {
"asset": "USD",
"amount": "50.00",
"node": {
"type": "account",
"id": "71e9fd4b-dfcd-4643-a5b0-51fd33e50a8d",
"ownerId": "48e40cb2-6c34-44ce-b2f1-6adac459bb37"
}
},
"status": "completed",
"quotedAt": "2025-06-18T00:55:39Z",
"createdAt": "2025-06-18T00:56:39Z",
"updatedAt": "2025-06-18T00:57:08Z",
"denomination": {
"asset": "USD",
"amount": "50.00",
"target": "origin"
}
}
}
```
***
## Notify the user
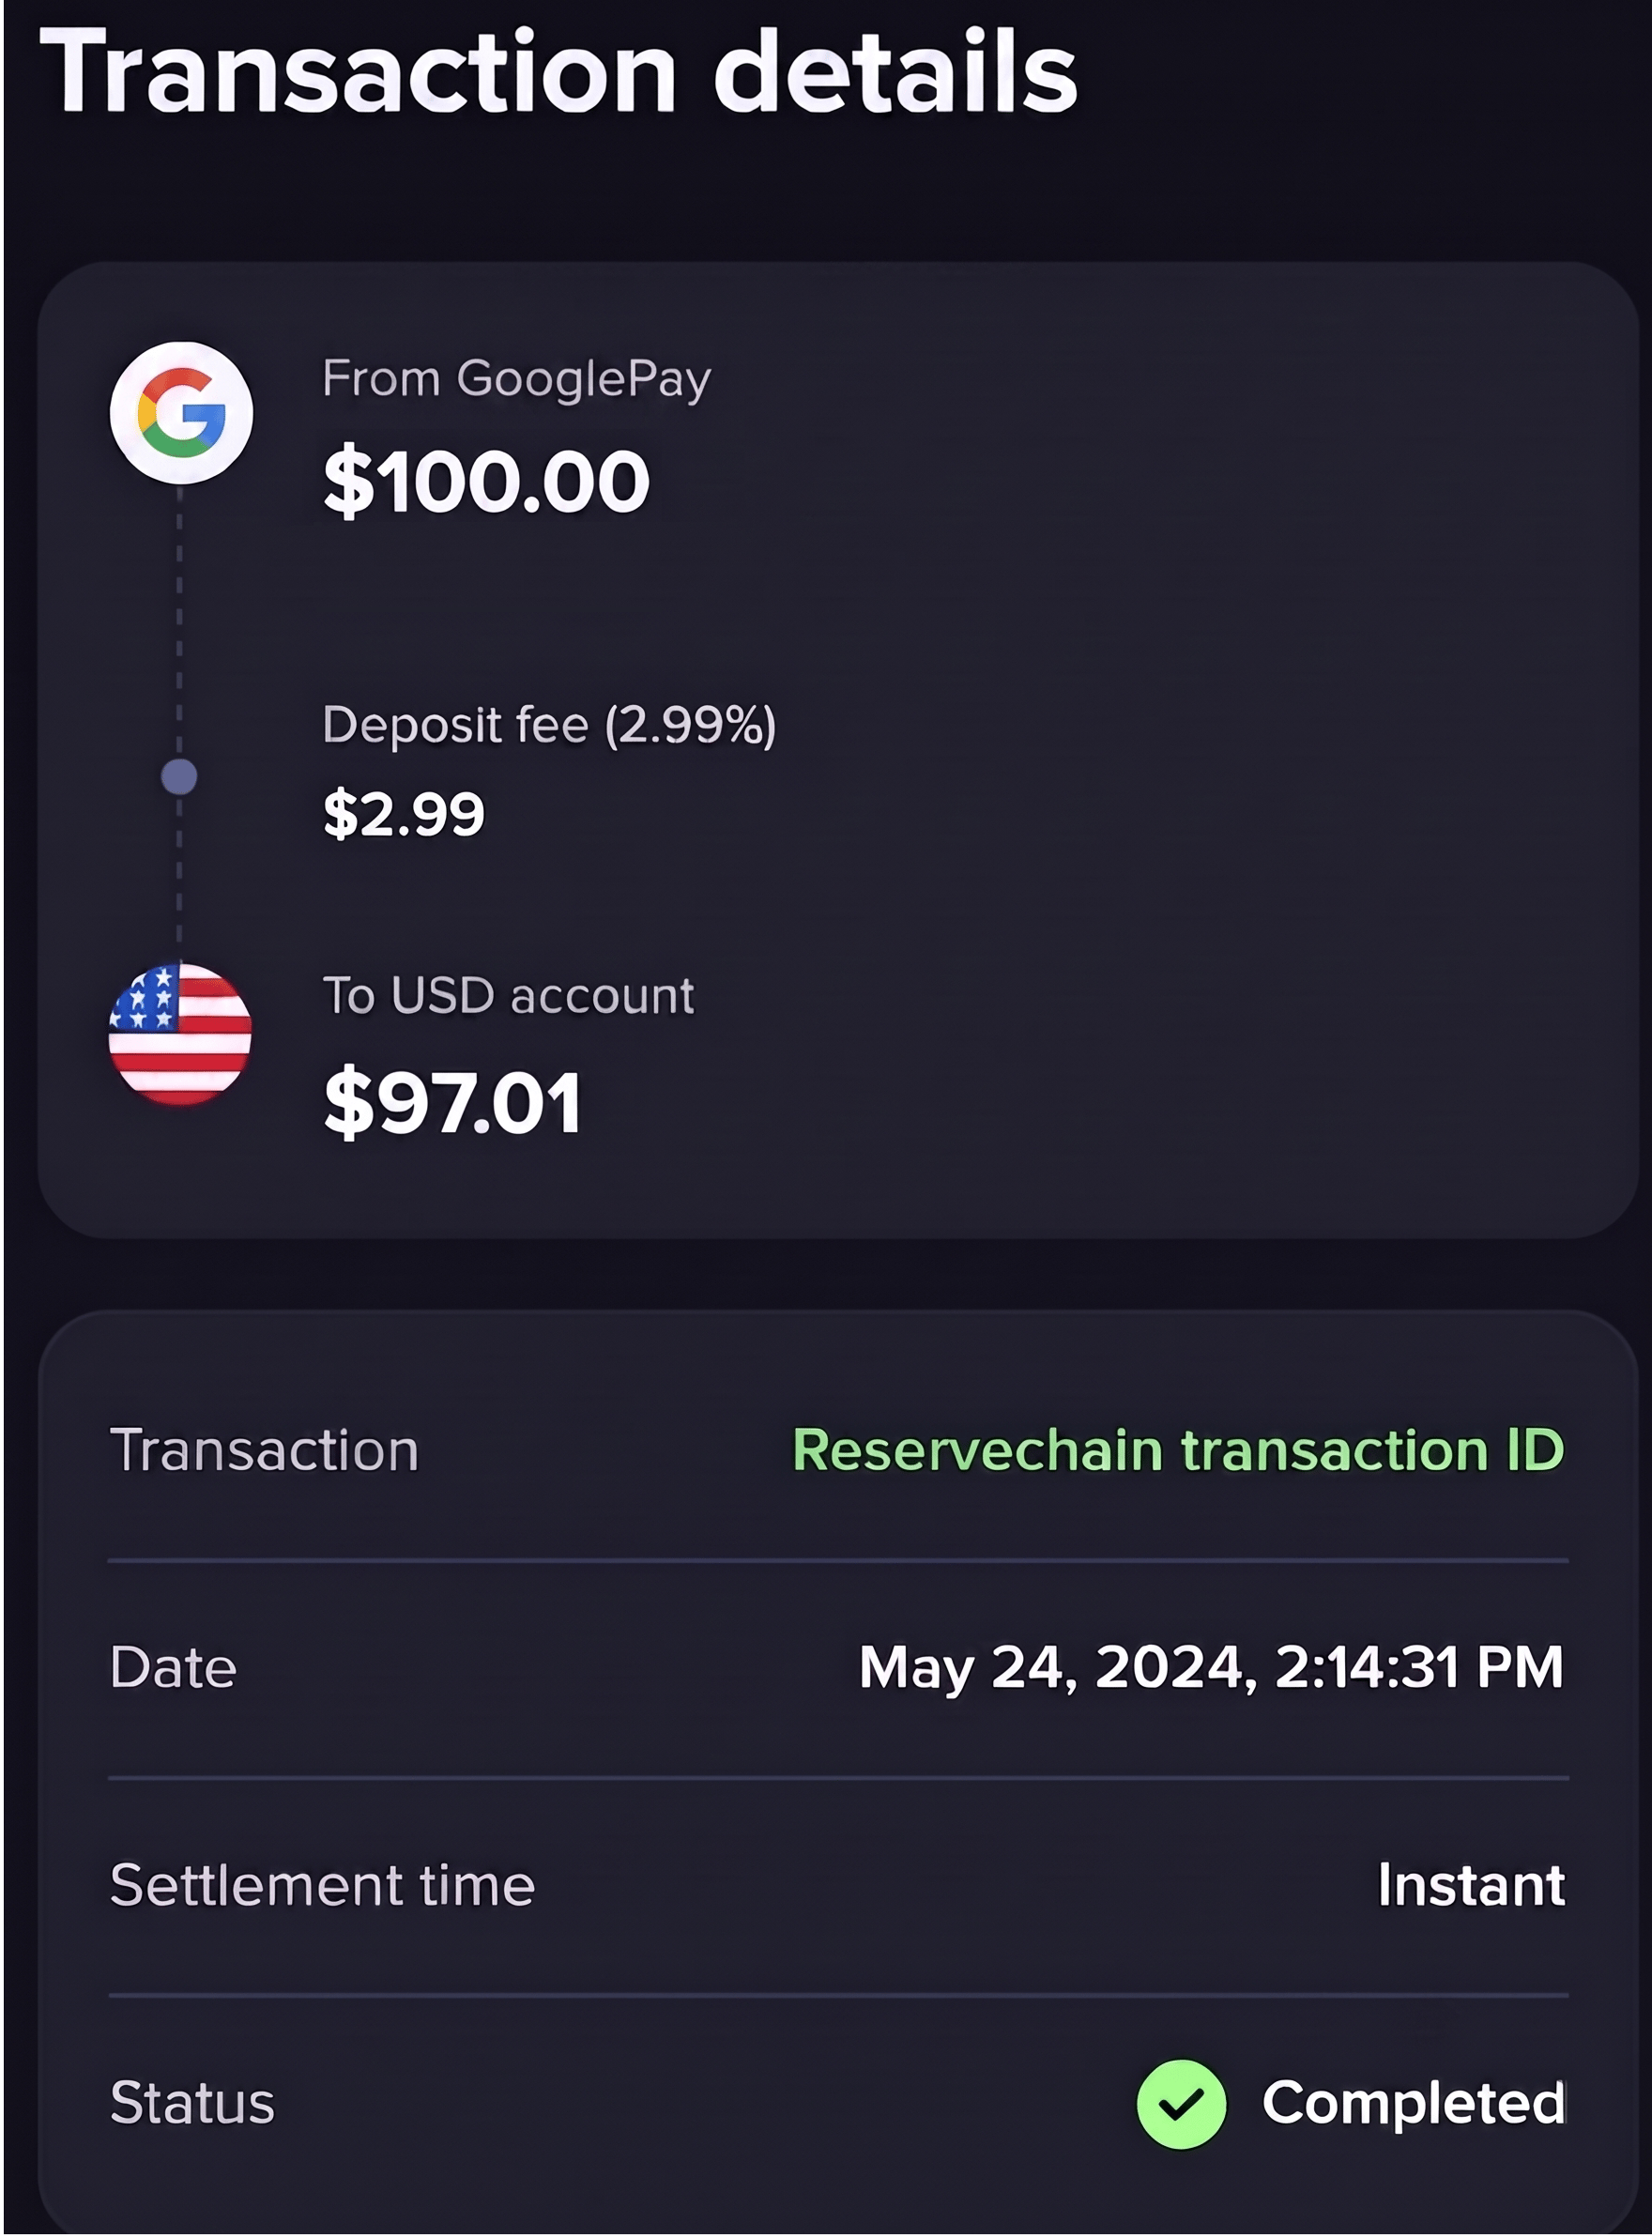
After the transaction completes, display the transaction details to the user so they can confirm the deposit succeeded. Here's an example:
***
## Troubleshooting
Having issues rendering Google Pay? See [Troubleshooting](/widgets/payment/installation-and-setup#troubleshooting) in the Payment Widget installation guide.
***
You now support Google Pay deposits via the Payment Widget.