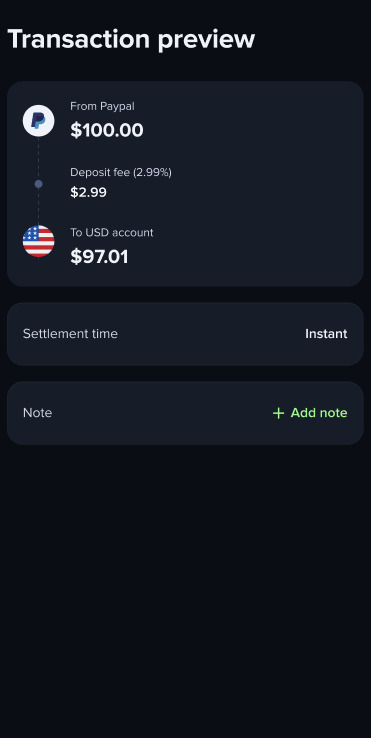
The Payment Widget handles PayPal selection for deposits via the Select for Deposit flow, where users can select or unlink a previously linked PayPal account directly in the widget. After the user confirms a PayPal deposit quote, the Payment Widget creates the transaction and completes the PayPal authorization — whether the account is new or already linked — via the Authorize flow.

Prerequisites

  • The user has completed onboarding, has the paypal capability enabled, and has a verified phone number.
  • Your app has integrated the Payment Widget SDK.
  • Your API client has the required scopes:
    • core.transactions:create — to create quotes and transactions
    • widgets.payment.sessions:create — to create widget sessions

Walkthrough

The diagram shows a first-time authorization. For an already-authorized account, skip the sign-in — the widget only collects device data and reuses the stored authorization.

Select deposit method

The Payment Widget’s Select for Deposit flow presents the available payment methods, letting the user select PayPal when it’s available. It performs selection only: it does not create the quote or the transaction.

Create a widget session

Call Create widget session to start the select-for-deposit flow.
POST /widgets/payment/sessions
{
  "flow": "select-for-deposit"
}
{
  "session": {
    "flow": "select-for-deposit",
    "url": "https://payment.enterprise.uphold.com/",
    "token": "GEbRxBN...edjnXbL"
  }
}
Pass response.session to your frontend to initialize the widget.

Set up the widget

import { PaymentWidget } from '@uphold/enterprise-payment-widget-web-sdk';

const initializeDepositWidget = async (session) => {
  const widget = new PaymentWidget<'select-for-deposit'>(session, { debug: true });

  widget.on('complete', (event) => {
    console.log('Complete', JSON.stringify(event.detail.value));
  });

  widget.on('cancel', () => {
    console.log('Cancelled');
    widget.unmount();
  });

  widget.on('error', (event) => {
    console.error('Error', event.detail.error);
    widget.unmount();
  });

  widget.mountIframe(document.getElementById('payment-container'));
};
For native apps using a WebView, you’ll need a bridge for events as outlined in Installation & setup.

Handle the complete event

The complete event fires after the user selects PayPal. The event payload includes the selected PayPal external account — if it has already been previously authorized.
widget.on('complete', (event) => {
  const { via, selection } = event.detail.value;

  // If via is 'apm', you can check the selected method through the property `selection.method`, which will be 'paypal' in this case.
  if (via === 'apm' && selection.method === 'paypal') {
    handlePayPalSelected();
  }

  widget.unmount();
});
Once you have the selection, prompt the user to choose a destination account, then create a quote.

Handle cancellations

widget.on('cancel', () => {
  widget.unmount();
  // Return the user to the previous screen
});

Handle errors

The error event fires for critical unrecoverable errors.
widget.on('error', (event) => {
  console.error('Widget error:', event.detail.error);
  widget.unmount();
  // Show a user-friendly error message
});
The Payment Widget handles most errors internally. For unrecoverable errors, the widget fires an error event. It is the host application’s responsibility to handle these events, present an error message to the user, and unmount the widget.

Select destination account

deposits can target any account. If the selected account is not in the account’s currency, the amount will be converted at settlement using Uphold’s prevailing rate. Make sure the destination asset has the necessary features enabled.

Find an existing account

Call List accounts to retrieve the user’s accounts and let them pick the one they want to fund.
GET /core/accounts
{
  "accounts": [
    {
      "id": "a00507fe-628c-4f27-ae81-e1c40b2a8fb8",
      "ownerId": "e4ce04dc-67b7-4e9f-af91-482cb6f9fc4a",
      "label": "My USD account",
      "asset": "USD",
      "balance": {
        "total": "500.00",
        "available": "500.00"
      }
    }
  ]
}

Create a new account

If the user has no accounts, create one with Create account before proceeding.
POST /core/accounts
{
  "label": "My USD account",
  "asset": "USD"
}
{
  "account": {
    "id": "a00507fe-628c-4f27-ae81-e1c40b2a8fb8",
    "ownerId": "e4ce04dc-67b7-4e9f-af91-482cb6f9fc4a",
    "label": "My USD account",
    "asset": "USD",
    "balance": {
      "total": "0",
      "available": "0"
    }
  }
}
Once the user selects PayPal and their account, proceed to Create a quote.

Create a quote

Call Create quote with PayPal as the origin and the user’s account as the destination. There are two ways to specify the PayPal origin:
  • apm shortcut — use type: "apm" with method: "paypal". This is always accepted, whether or not the user already has a linked PayPal account.
  • external-account reference — if the user already has a linked PayPal account, you can reference it directly with type: "external-account" and its id (from List external accounts):
    {
      "origin": {
        "type": "external-account",
        "id": "9d3cce5f-a448-f985-b64f-a62930b18eea"
      }
    }
    
The example below uses the apm shortcut.
POST /core/transactions/quote
{
  "origin": {
    "type": "apm",
    "method": "paypal"
  },
  "destination": {
    "type": "account",
    "id": "71e9fd4b-dfcd-4643-a5b0-51fd33e50a8d"
  },
  "denomination": {
    "asset": "USD",
    "amount": "50",
    "target": "origin"
  }
}
A successful response includes the quote details and a requirements array. If it contains authorize:paypal, the user must authorize PayPal before the transaction can be created.
{
  "quote": {
    "id": "c3e8d2f7-9a41-4b75-b8e3-1d6f4a9c2e57",
    "origin": {
      "amount": "50.00",
      "asset": "USD",
      "node": {
        "type": "apm",
        "method": "paypal"
      },
      "rate": "1"
    },
    "destination": {
      "amount": "50.00",
      "asset": "USD",
      "node": {
        "type": "account",
        "id": "71e9fd4b-dfcd-4643-a5b0-51fd33e50a8d",
        "ownerId": "48e40cb2-6c34-44ce-b2f1-6adac459bb37"
      },
      "rate": "1"
    },
    "denomination": {
      "asset": "USD",
      "amount": "50.00",
      "target": "origin",
      "rate": "1"
    },
    "fees": [],
    "expiresAt": "2025-06-18T01:55:39Z",
    "requirements": [
      "authorize:paypal"
    ]
  }
}

Authorize and create the transaction

After the user confirms the PayPal deposit quote, hand off to the Payment Widget Authorize flow. It creates the transaction, runs the PayPal authorization, and polls until a terminal status is reached — so the same flow works for both new and already-authorized accounts.

Create an authorize session

Call Create widget session with flow: "authorize", the quoteId and with the requirements array containing authorize:paypal.
POST /widgets/payment/sessions
{
  "flow": "authorize",
  "data": {
    "quoteId": "<quoteId>",
    "requirements": [
      "authorize:paypal"
    ]
  }
}
{
  "session": {
    "flow": "authorize",
    "url": "https://payment.enterprise.uphold.com/",
    "token": "GEbRxBN...edjnXbL",
    "data": {
      "quoteId": "<quoteId>",
      "requirements": [
        "authorize:paypal"
      ]
    }
  }
}

Set up the widget

Initialize the widget with the session. The widget interacts with PayPal, creates the transaction, and polls until a terminal status is reached. For a new account the user signs in to PayPal to authorize; for an already-authorized account they do not sign in again — the widget only collects device data and reuses the stored authorization.
import { PaymentWidget } from '@uphold/enterprise-payment-widget-web-sdk';

const initializeAuthorizeWidget = async (session) => {
  const widget = new PaymentWidget<'authorize'>(session, { debug: true });

  widget.on('complete', (event) => {
    const { transaction, trigger } = event.detail.value;
    console.log('Complete', transaction.status, trigger.reason);
    widget.unmount();
  });

  widget.on('cancel', () => {
    console.log('Cancelled');
    widget.unmount();
  });

  widget.on('error', (event) => {
    console.error('Error', event.detail.error);
    widget.unmount();
  });

  widget.mountIframe(document.getElementById('payment-container'));
};
For native apps using a WebView, you’ll need a bridge for events as outlined in Installation & setup.

Handle the complete event

The complete event does not guarantee success. Always check transaction.status and trigger.reason.
widget.on('complete', (event) => {
  const { transaction, trigger } = event.detail.value;

  if (trigger.reason === 'transaction-status-changed') {
    if (transaction.status === 'completed') {
      // Show success — the account is now authorized and the transfer settled
    } else if (transaction.status === 'failed') {
      // Map transaction.statusDetails.reason to a user-facing message
    }
  } else if (trigger.reason === 'max-retries-reached') {
    // Widget stopped polling — continue monitoring via webhooks or polling
  }

  widget.unmount();
});
Failure reasons in transaction.statusDetails.reason:
ReasonDescription
apm-authorization-failedThe PayPal authorization could not be completed
apm-payment-method-declinedPayPal declined the payment method
apm-account-holder-data-mismatchThe account holder details did not match
apm-missing-account-holder-dataRequired account holder details were missing
insufficient-fundsThe origin account has insufficient funds
provider-maximum-limit-exceededThe transaction exceeds provider limits
velocityThe transaction was blocked by velocity rules
unspecified-errorThe transaction failed for an unspecified reason

Handle cancellations

The cancel event fires when the user navigates back without completing authorization.
widget.on('cancel', () => {
  widget.unmount();
  // Return the user to the previous screen
});

Handle errors

The error event fires for critical unrecoverable errors.
widget.on('error', (event) => {
  const { code, details } = event.detail.error;
  console.error('Widget error:', code, details);
  widget.unmount();
  // Show a user-friendly error message
});
Error codes in event.detail.error.code:
CodeDescription
entity_not_foundThe quote was not found or has expired
insufficient_balanceThe origin has insufficient balance
operation_not_allowedThe operation is not permitted
user_capability_failureThe user lacks the required capability for this operation
The Payment Widget handles most errors internally. For unrecoverable errors, the widget fires an error event. It is the host application’s responsibility to handle these events, present an error message to the user, and unmount the widget.

Monitor for settlement

transactions remain in processing while the payment settles. Monitor until the transaction reaches a terminal state.

Sample transaction

In a successful PayPal deposit, the origin is the external account representing the user’s PayPal account and the destination is the user’s account.
{
  "transaction": {
    "id": "9b2f4a17-5e3c-4d77-a8e1-9bcdef2c0a42",
    "origin": {
      "asset": "USD",
      "amount": "50.00",
      "node": {
        "type": "external-account",
        "id": "90acb64a-510d-f9d1-b542-d44e6c53eb5d",
        "ownerId": "48e40cb2-6c34-44ce-b2f1-6adac459bb37"
      }
    },
    "destination": {
      "asset": "USD",
      "amount": "50.00",
      "node": {
        "type": "account",
        "id": "71e9fd4b-dfcd-4643-a5b0-51fd33e50a8d",
        "ownerId": "48e40cb2-6c34-44ce-b2f1-6adac459bb37"
      }
    },
    "status": "completed",
    "quotedAt": "2025-06-18T00:55:39Z",
    "createdAt": "2025-06-18T00:56:39Z",
    "updatedAt": "2025-06-18T00:57:08Z",
    "denomination": {
      "asset": "USD",
      "amount": "50.00",
      "target": "origin"
    }
  }
}

Notify the user

After the transaction completes, display the transaction details to the user so they can confirm the deposit succeeded. It must include the PayPal logo and the PayPal account email used. Here’s an example:
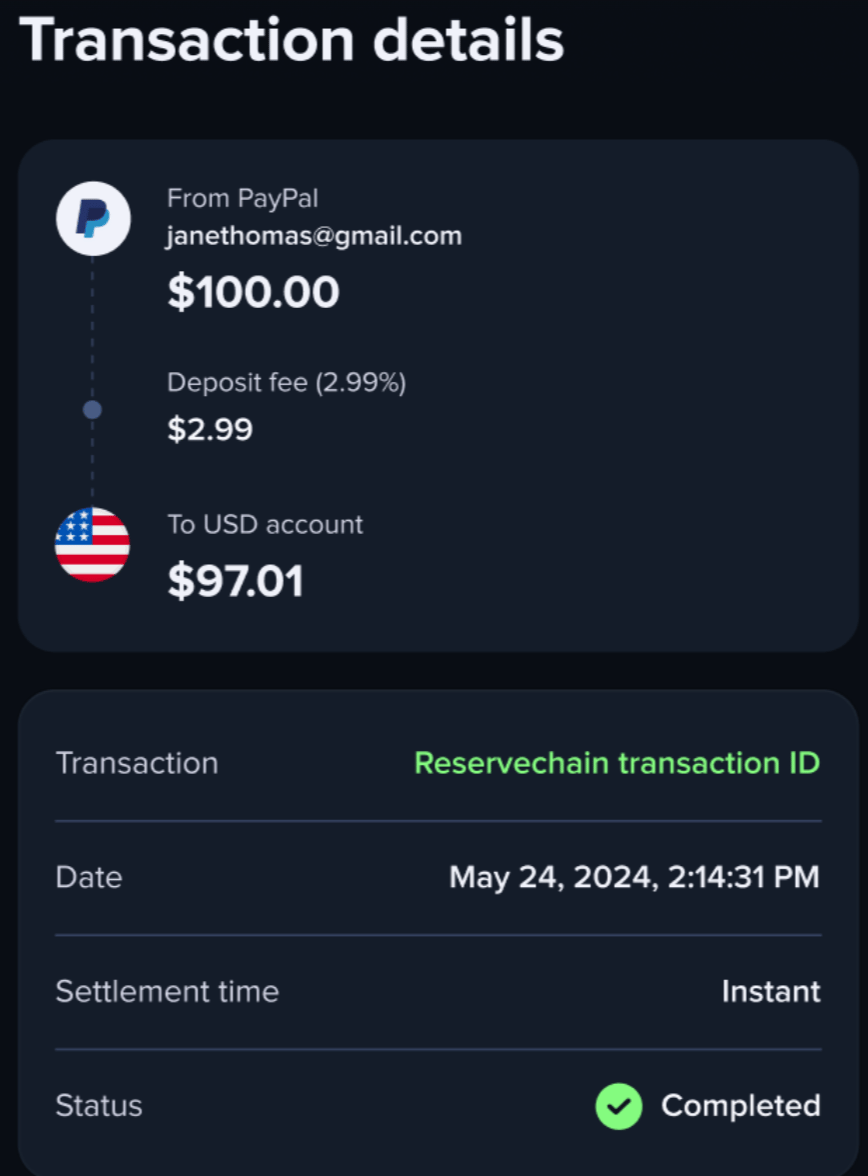
PayPal transaction completed confirmation
You now support PayPal deposits via the Payment Widget.