

Prerequisites
- The user has completed onboarding.
- The
google-paycapability is enabled. - The Payment Widget is set up in your frontend.
- Google Pay’s additional setup requirements are met.
Walkthrough
The diagram shows a Google Pay transaction authorization.Check available rails
Call List rails to verify Google Pay deposit is available.Check capabilities
Call List capabilities to confirm the user has thegoogle-pay capability enabled with no unmet requirements.
Select destination account
Google Pay deposits can target any account. If the selected account is not in the Google Pay account’s currency, the amount will be converted at settlement using Uphold’s prevailing rate. Make sure the destination asset has the necessary features enabled.Find an existing account
Call List accounts to retrieve the user’s accounts and let them pick the one they want to fund.Create a new account
If the user has no accounts, create one with Create account before proceeding.Create a quote
Call Create quote with Google Pay as the origin and the user’s account as the destination. Specify Google Pay as the origin withtype: "apm" and method: "google-pay".
requirements array. For Google Pay, it contains authorize:google-pay, which indicates that the user must authorize Google Pay before the transaction can be created.
Present the order summary
Before creating the transaction, display an order summary of the quote — the amount, fees, and the origin and destination — so the user can review it. Here’s an example: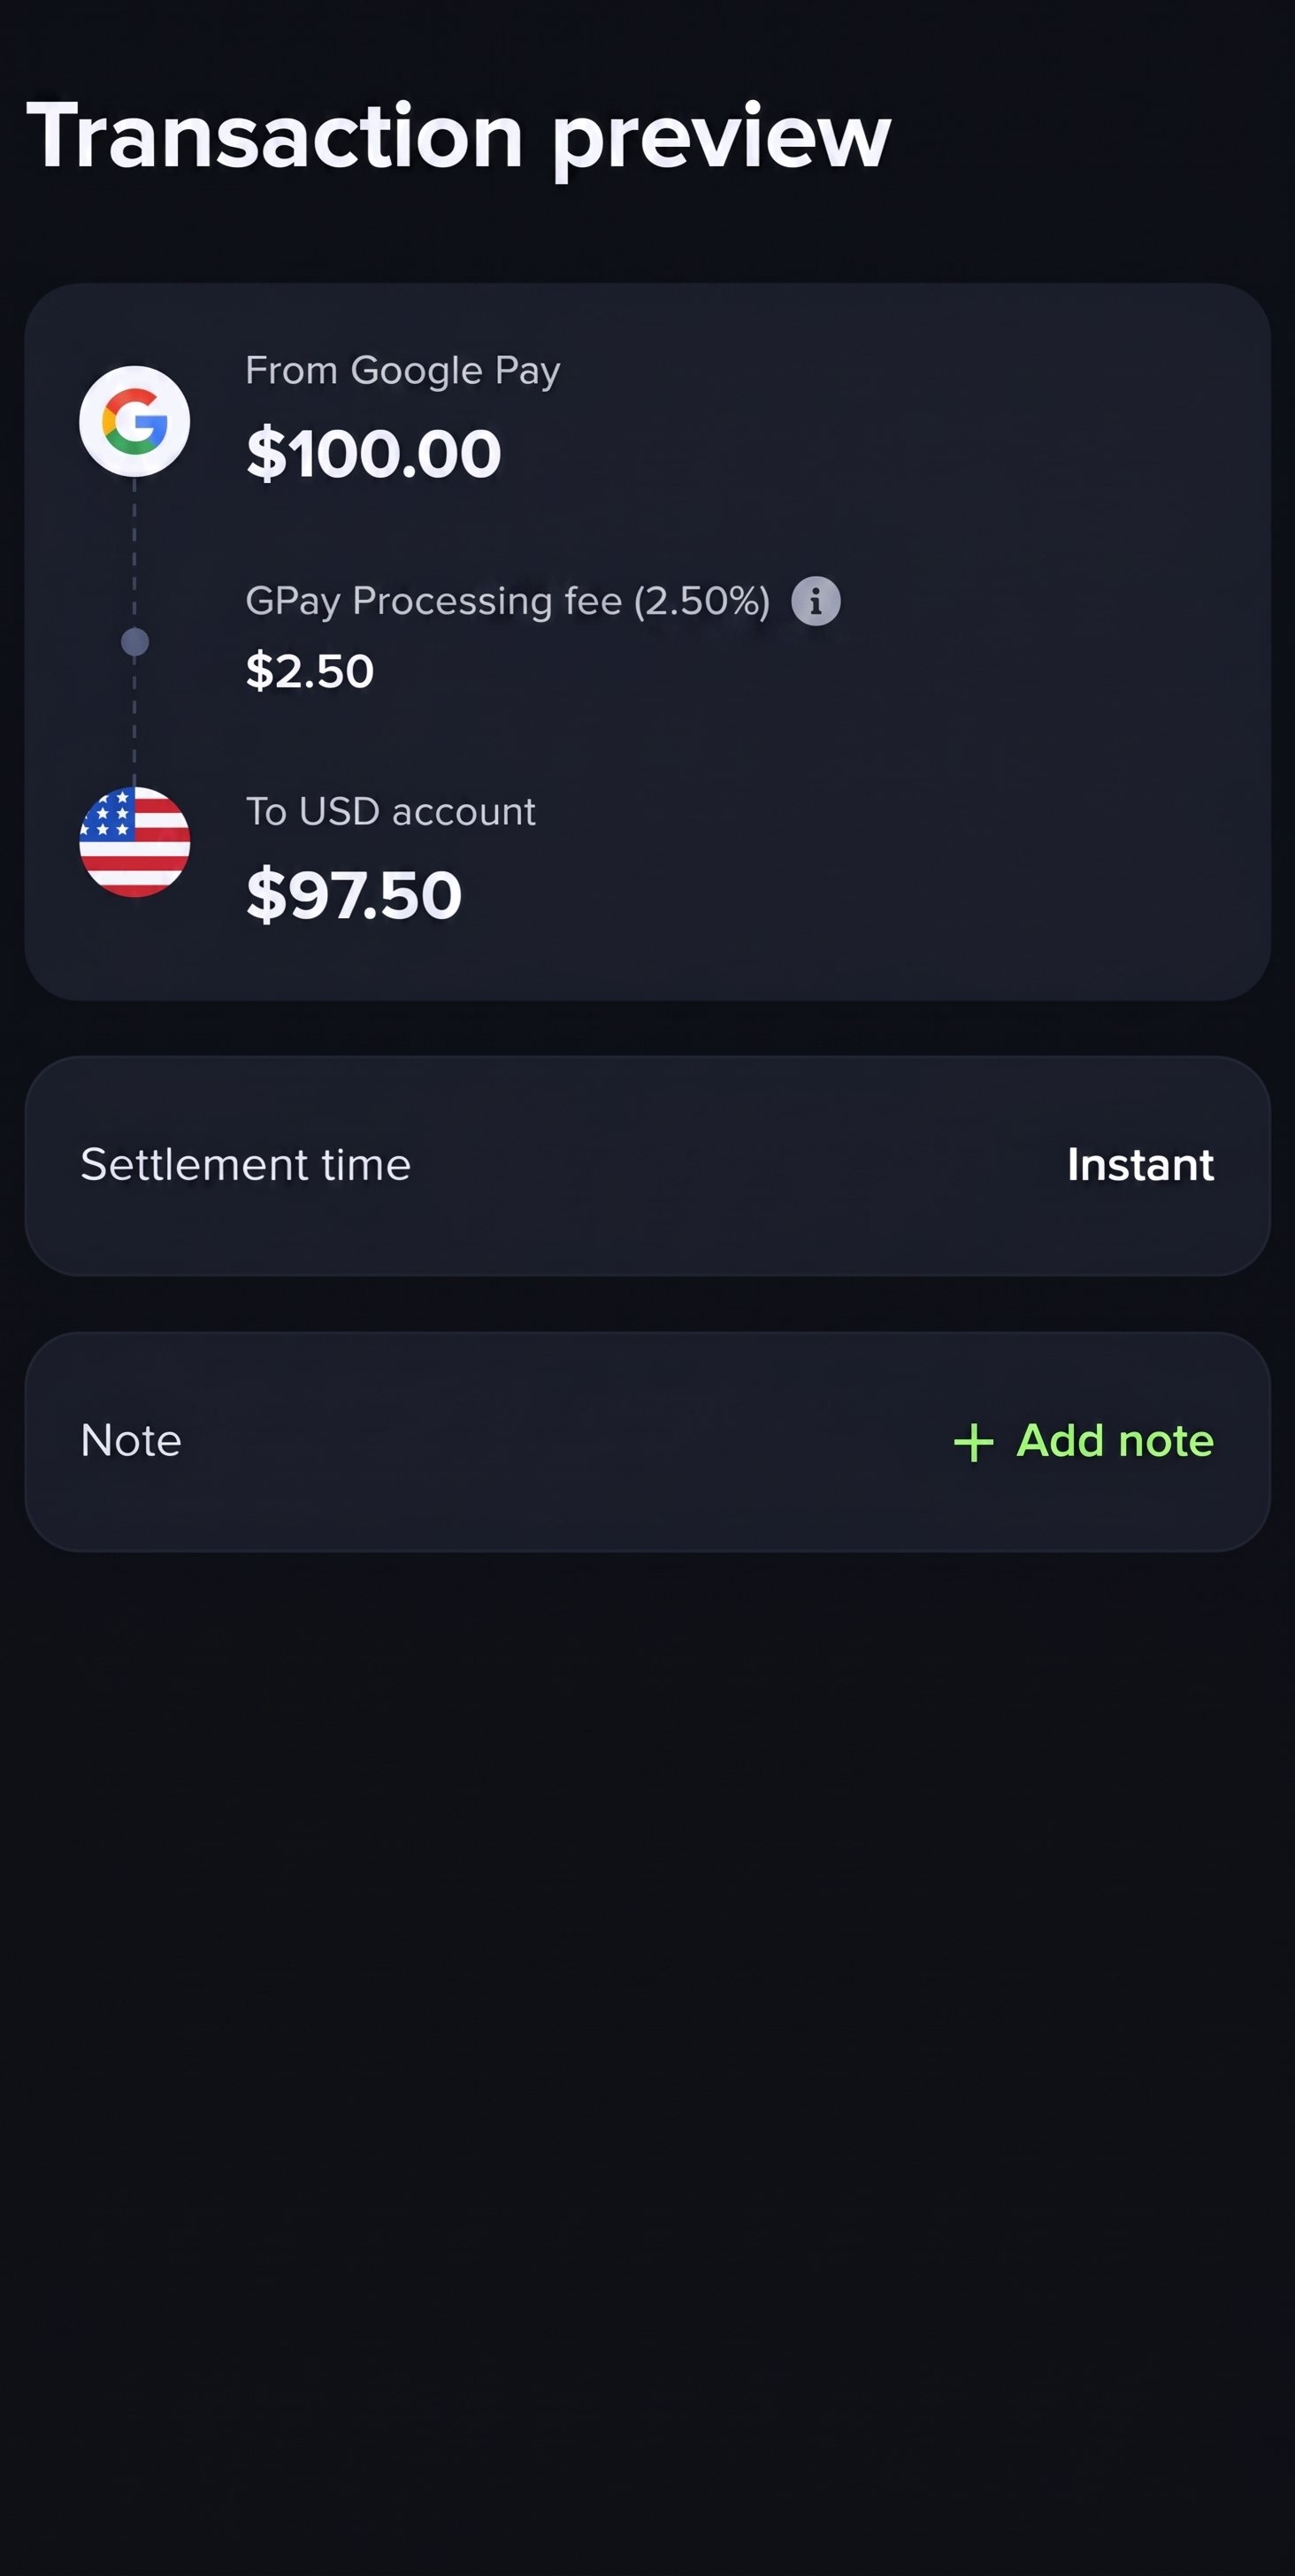
Authorize and create the transaction
After the user confirms the Google Pay quote, hand off to the Payment Widget Authorize flow. It presents the Google Pay sheet, creates the transaction, and polls until a terminal status is reached. Google Pay authorizes per transaction — there is no stored authorization to reuse, so the user confirms via the Google Pay sheet every time. By default, the widget renders a full walkthrough around the authorization; in headless mode, it renders only the Google Pay button so you can embed it directly into your own UI — see Headless mode below.Authorization challenges
Some deposits take one more step after the user confirms the Google Pay sheet: the card backing the wallet may also need to be authorized, through a challenge such as 3DS. The card’s issuer decides this per transaction, so it isn’t known until the transaction is created. The Authorize flow covers this: when a challenge is required, the widget presents it to the user, and only polls for a terminal status once it’s resolved. The same integration works whether or not a challenge comes up — there is nothing extra to handle on your side, beyond expecting those deposits to take longer to complete.Headless mode is only supported on Android devices and cards that support
CRYPTOGRAM_3DS. Cards requiring 3D Secure (3DS) authentication are not supported in headless mode — see Headless mode below.Create an authorize session
Call Create widget session to start theauthorize flow, passing the quoteId and adding authorize:google-pay to the requirements array. To enable headless mode, set authorize.mode to headless in options. To customize the theme and layout, see the example here.
session object with a url field that loads the widget. Return response.session to your frontend as is.
Set up the widget
Initialize the widget with the session. The widget presents the Google Pay sheet, collects device data, creates the transaction, and polls until a terminal status is reached.Both examples above are for web applications — either creating the iframe yourself or letting the SDK do it. For native apps using a WebView, see Native apps with the Web SDK for the SDK’s native-bundling pattern, or Setup without the SDK for the no-SDK approach that loads the session
url directly as the WebView’s top-level page.Headless mode
By default, the widget renders a full authorization experience — a short walkthrough, the Google Pay button, and a processing screen while the transaction is confirmed. In headless mode, it renders only the Google Pay button, with no surrounding UI, so you can embed it directly into your own layout. Your app then owns the surrounding context and the post-authorization experience — progress and success feedback, and a way to cancel. To enable it, setauthorize.mode to headless in the options of the Create widget session request:
AuthorizeFlowOptions in the SDK reference for the full type definition.
Handle the complete event
transaction.statusDetails.reason:
Handle cancellations
Thecancel event fires when the user dismisses the Google Pay sheet or navigates back without completing authorization.
Handle errors
Theerror event fires for critical unrecoverable errors — except authorize_transaction_failed, which is retryable in headless mode: the widget resets itself back to its ready state, so the Google Pay button works again if you leave the widget mounted. In default mode there is no in-place retry for this code — the button does not become usable again, so unmount and create a new authorize session if you want the user to try again.
authorize_transaction_failed is the retryable code for Google Pay authorization and transaction-creation failures. event.detail.error.details.reason narrows down where it happened:
| Reason | Description |
|---|---|
unable-to-create-payment-request | The browser could not build the Google Pay payment request |
unable-to-make-payment | The device or browser reported it cannot make this payment |
unable-to-show-payment-request | The Google Pay sheet could not be shown |
invalid-payment-response | The Google Pay sheet returned a response without the expected payment token |
unable-to-create-transaction | Google Pay authorization succeeded, but the transaction itself could not be created — see event.detail.error.cause below for the underlying reason |
code and are not retryable; handle those with a generic fallback.
As with any Widget error, the original failure is preserved in event.detail.error.cause. When details.reason is unable-to-create-transaction, event.detail.error.cause.code is one of:
Monitor for settlement
Google Pay deposit transactions remain inprocessing while the payment settles. Monitor until the transaction reaches a terminal state.
- Webhook events (recommended):
- core.transaction.created —
status: processing→ transaction created, pending settlement - core.transaction.status-changed —
status: completed→ funds settled;status: failed→ irrecoverable error
- core.transaction.created —
- Polling (fallback): Get transaction
Sample transaction
In a successful Google Pay deposit, the origin is represented as anapm node with the method as {apmMethod}. The destination is the user’s account.
Notify the user
After the transaction completes, display the transaction details to the user so they can confirm the deposit succeeded. Here’s an example: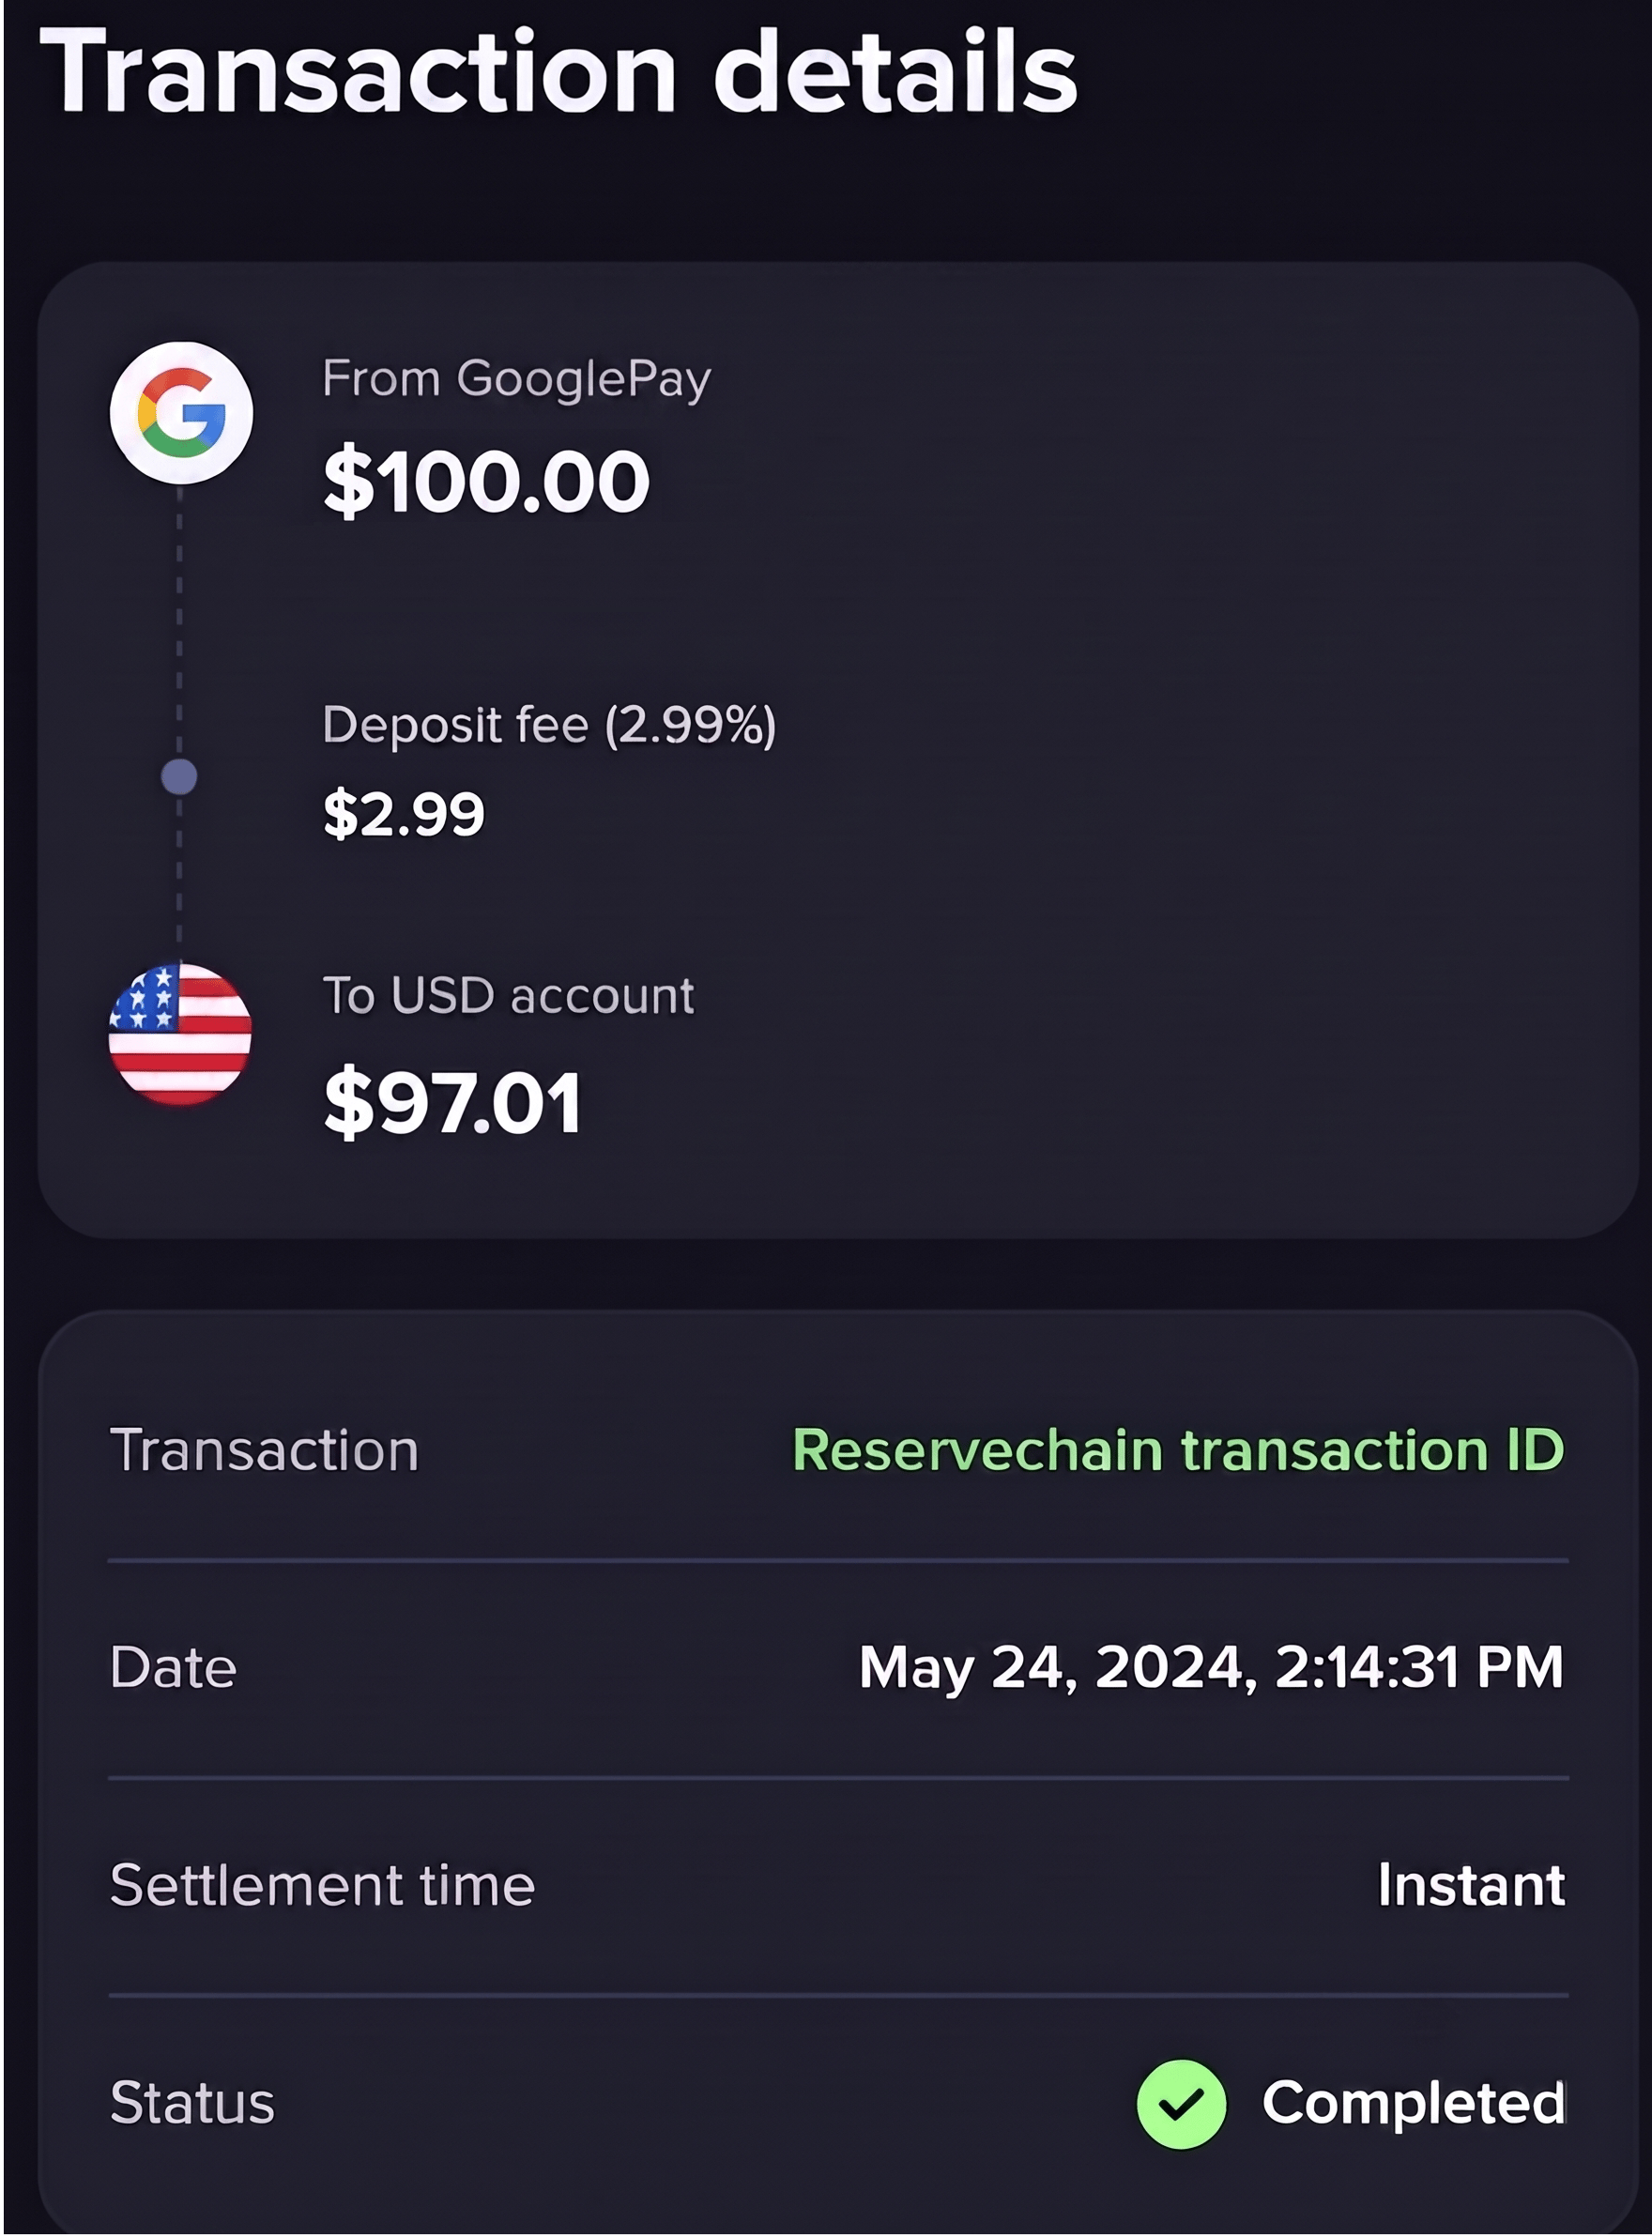
Troubleshooting
Having issues rendering Google Pay? See Troubleshooting in the Payment Widget installation guide.You now support Google Pay deposits via the REST API together with the Payment Widget.